The Month(s) In Development May 10th 2015 to July 31st 2015
Another 3 months of working on the game, another 200+ commits of code pushed.
So what did I do with all that time?
Major Things:
- Finished the conversion to PixiJS and all the rendering optimizations that went along with it
- Improved map generation
- Added visiting merchant and trading mechanic
- Added more monsters and an adventurer who helps slay monsters
Smaller Things
- Citizens can have multiple professions
- Added basic equipment to the game
- Got crafting professions (mostly) working again
Oh yeah and I updated the site again. Before there was relatively no introduction to what the game was about on the homepage. So if you happened to wander to the site of your own accord you’d probably have no idea what you’re looking at and would bounce off pretty hard. Now the landing page actually gives a brief intro the game and separates the blog posts into a separate section.
This week I’m just going to talk about map generation because that’s a somewhat lengthy topic in and of itself. My next blog post will get into some of the other items on the “Major Things” list, most notably, the introduction of the merchant and trading into the game.
Let’s get started.
Should have PIXI’d a better engine to begin with
So if you’ll recall I ended the last post talking about how I was in the process of converting the underlying rendering code from using Phaser to using PIXI directly. And I can tell you it went great. My method of only rendering what needed to be rendered into sub containers worked really well. That paired with some optimizations such as rendering a large number of static/unchanging sprites into a single very large sprite means that I can get 60 fps with no problem. Even when running the game at incredibly fast speeds (i.e. all your villagers are sprinting around the screen and you have no idea what is going on).
So the light at the end of the tunnel was in fact the metaphorical sun of “achievable performance gains” and not the metaphorical train of “being forced to rewrite the entire game to run in Unity or something”.
Yay.
“Wow this map isn’t crap”
To the discerning reader, the maps may have seemed a little bland and repetitive. And being a discerning reader, their observation would be very…discerned and correct and stuff. Because the generated maps were pretty bad.
Ahhhhh my eyes! Oh the monotony and humanity!
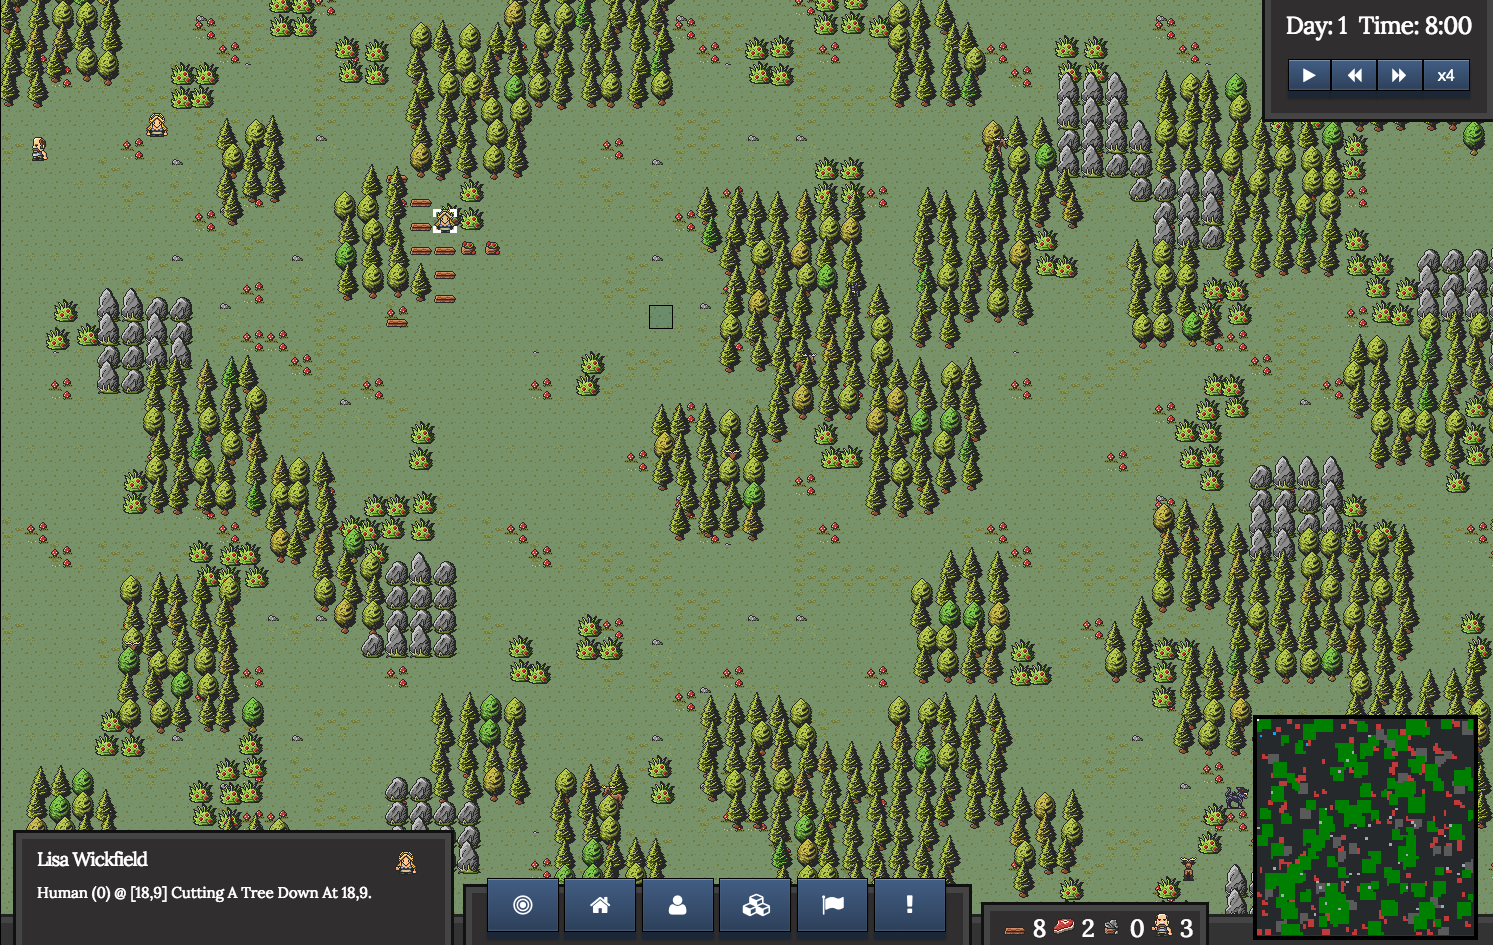
If you look at the minimap in the lower right hand corner of the above image you can see that it doesn’t really look like any natural formation of land that you’d encounter on the planet.
The reason for this is because my initial quick and dirty solution to map generation was to just randomly pick spots on the map and then generate a block of resources. That’s it. So you’d end up with lots of overlapping square patterns made up of trees, rocks, or bushes. Which was great for how little time it took me to code up. It got something playable and testable in roughly 0 time. But I needed to improve upon it.
Now, the topic of generating 2D maps for games is a fairly well covered topic so I won’t cover it here. But I can summarize my algorithm from a very high level perspective.
-
Generate a flat base sprite based on the biome. I.e. a huge swathe of green for the forest biome. Think of this as the base coat of paint.
-
Generate water on top of this.
-
“Normalize” the water. What I mean by “normalize” here is to basically make the water and grass tiles mesh well together.
-
Randomize the biome tiles. I.e. we don’t want solid green for every land tile, we want to have a random assortment of tiles to break things up.
-
“Bridge” islands that were created during the water step. Because the way water is generated randomly, there are portions of land that can become inaccessible (water cannot be traversed by any agent). This step takes care of this problem by spawning bridges of land over portions of water to make sure that all pieces of land are connected to at least one other portion of land. (Based on a basic graph theory proof this means that all land is connected as a single contiguous mass.)
-
Generate hills on the map. (There’s also some normalization similar to water that has to happen here.)
-
Generate resources. This generates all the trees, rocks, and bushes on the map.
So let’s break that down a little bit. The main interesting things are 1) how do we lay out the water on the map 2) what does “normalizing” the tiles mean 3) how do we generate bridges and 4) how do we generate resources/decide where they go.
Was ist das Wasser?
A lot of processes for 2D random map generation revolve around or at least heavily involve noise generation algorithms to generate randomized, fluid, less obviously-machine-generated looking patterns. Specifically, perlin noise is a very popular one.
It looks like this
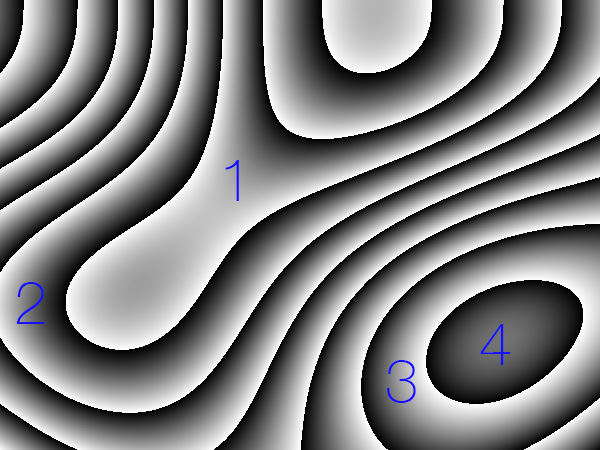
That picture is one example of how you can configure perlin noise to generate random patterns and is very close to the pattern I use in my map generation algorithm. You can think of each section of that picture as having a corresponding number and then you can map certain terrain features to fall within those numbered sections. So specifically for water I like the look of the number 2 section because it looks like a river. But I could have just as easily said I like 1. Or I could say I want the bodies of water to be more like ponds or lakes than rivers and could then map water to both 3 and 4.
Now of course this is randomized so not every graph of noise is going to look the same. Generally however, given a fixed set of input parameters, you can get quite a bit of variability in the map while still, from a high level perspective, maintaining certain general characteristics or features (large flowing rivers, round hills, etc.). In the case of water generation I aimed for large sweeping, fluid patterns instead of noisy, small, chaotic patterns because I thought it gave the map a more natural appearance.
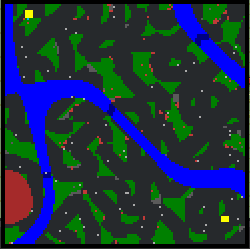
The finished product on the minimap
Normalizing To Fit In
So we start with a blanket of green tiles and then we add water tiles over them, right? Well because of this we have to have unique sprites for every possible configuration of neighboring grass and water tiles. What do I mean by this? Well, let’s take a look at an example.
It looks alriiiight I guess…
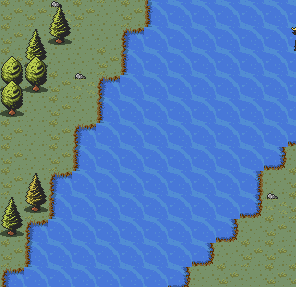
What sticks out from the picture above? Well you can see where the grass tiles form a corner, the water tile diagonally adjacent overlaps over it so you don’t have a nice smooth corner like elsewhere. So when I say “normalize” I mean I go through all these edge cases and properly map them to the proper water tile sprite that has the proper edge with grass along it to match its neighbors.
All better

Pretty simple stuff but it’s things like this that really bring up the graphical fidelity of the game and make people not wretch at the sight of it. At least they won’t wretch until they go to the about page and see my face.
Bridgeway To Heaven
One of the design decisions I made with regard to the maps in Ripple is that water should be impassable. I have two reasons for this. 1) It’s easier to code “correctly”. When I say correctly I mean, if water was passable I would have to define what types of entities could swim and then I’d probably have to write some code around swimming and maybe drowning etc. etc. 2) It adds some strategic depth to the map. Because certain areas of the map are inaccessible you can plan your place to start your town on the map based around this fact. You could take advantage of a single bridge to a corner to bottleneck the flow of enemies into your town etc.
But even if parts of the map are inaccessible I still wanted to have all land accessible. If you got stuck on an island in the center of the map and could never interact with the outside world that would be pretty ridiculous. Enter bridges.
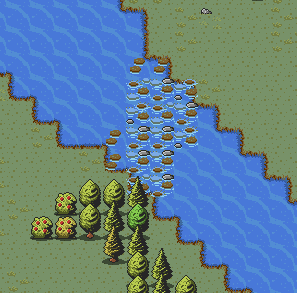
Programmatically they were pretty cool to implement. Basically I used a flood fill algorithm to separate the map’s tiles into groups based on which disconnected section of land they belonged to. Then I would iterate through each section, find the closest pair of tiles between its tiles and any of the other sections’ tiles. Then finally I would draw a path between those two over the water and fill it in with land. Pretty simple stuff.
Flood fill algorithm at work

I decided to go the Age of Empires 2 route and make the bridges made of a half land, half water, marshy type land so the result looks like this:
Generating Resources
As I said earlier I used to just randomly plop resources down on the map in chunks and that was pretty much the extent of my “map generation”. Well, good news everyone, I still do this for every resource except for trees. Trees I went ahead and made them spawn in fluid patterns using perlin noise pretty much exactly the same way as water.
The main difference, which you can see if you look at the above picture, is that the pattern looks a bit more jagged. That’s because I decided the fluid pattern which was suitable for water was a little bit too fluid for a forest. So I added an extra step to the process that follows a path close by and then randomly clears out variable sized patches along the path. This creates something a little bit more chaotic and, in my eyes at least, realistic and interesting looking. It also produces some nice clearings suitable for starting your village.
What’s Next?
Well, first of all I had a lot more planned for this post but talking about the general improvements to map generation turned out to be plenty for one post. So stay tuned and I’ll be following this one up in the next week or so with a post about the addition of a merchant, trading items, new monsters, and some other stuff.
Der Changelog
Subscribe
Oh and don’t forget to subscribe if you want to keep up with how the game is developing!